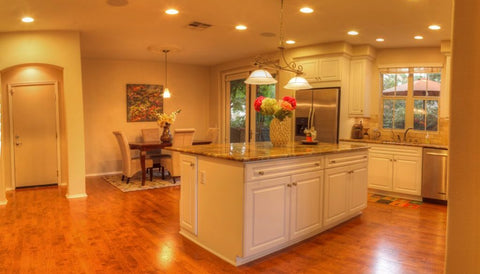
One of the most effective ways to enhance the beauty and elegance of your home or office is through proper lighting. A well-illuminated room can greatly improve its overall aesthetics. One of the best lighting options for homes and commercial spaces is recessed lighting, also known as downlights, can lights, or pot lights.
Read more: Efficient Ambiance: Creating Atmosphere with LED Lighting
Recessed lighting fixtures are installed into hollow openings in the ceiling and focus their light in a downward direction, either as a broad floodlight or narrow spotlight. They can be used for various purposes and in different areas of your home, such as the kitchen, bathroom, hallway, or bedroom. Recessed lighting is incredibly versatile and can be installed in virtually any spot you desire, providing ambient light or accent lighting to highlight furniture, artwork, or walls.
If you've been searching for a comprehensive guide to help you install recessed lighting without any difficulties, you're in the right place. In this article, you'll learn everything you need to know about recessed lighting and how to successfully install it if you're a DIY enthusiast.
Types of Recessed Lighting
There are different types of recessed lighting available, each suitable for specific purposes:
Ambient/General Lighting:
This type of lighting is commonly installed in the ceiling of living rooms or kitchens, where there is a lot of foot traffic. It can also be used for downlighting.
Read more: Do LED Lights Damage Walls?
Accent/Spot Lighting:
Accent lighting is used to highlight focal points in a room, such as artwork or a fireplace mantle. The optimal angle for reducing glare when spotlighting art is 30 degrees.
Wall Washing:
Wall washing lighting is less harsh than direct downlighting. It is used to illuminate pathways or stairs with an angled flange to direct the light down.
Components of Recessed Lighting
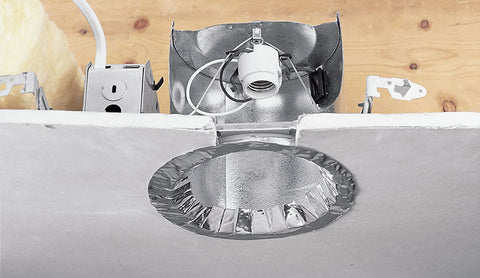
A recessed light fixture consists of four main parts: housing, trim, baffles, and a lamp. Let's take a closer look at each of these components.
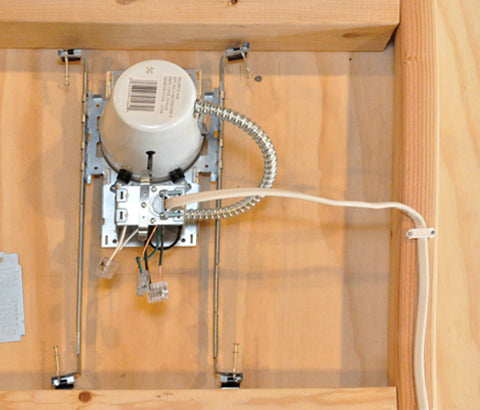
1. Housing
The housing is the main fixture that is recessed into the ceiling, wall, or ground. It contains the lamp holder, mounting, and other electrical parts.
- How to Select the Housing:
- New Construction: This type of housing is designed for locations with visible ceiling joists and no drywall. It is installed from above.
- Remodel: This housing is suitable for upgrading existing fixtures and LED lights. It is installed from below by wiring the fixture before putting it in place.
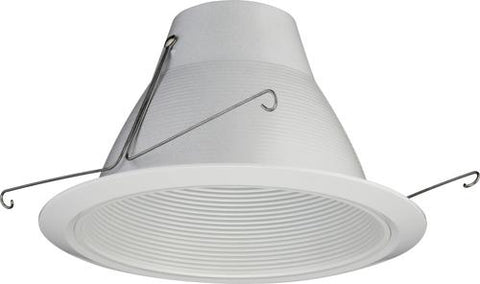
2. Trim
The trim is the visible portion of the light and surrounds the edge of the fixture. It adds beauty to the light and can be used to direct the beam if you're spotlighting or wall washing.
- Selecting the Trim:
- Aesthetics: Choose a trim according to your taste and the desired effect. You can opt for a square aperture for a modern look or a circular one for a classic aesthetic. Flanged trims give a noticeable look, while non-flanged trims blend seamlessly with the surface. Beveled trims add depth, and flat trims provide a minimalist finish.
- Functionality: Wet or damp location trims should be used in areas where water could come in contact with the trim, such as showers. Adjustable trims are suitable for sloped ceilings or walls, while fixed trims should be used for general lighting. Open reflector trims emit the highest amount of light, while baffle and specular trims reduce glare.
3. Baffles
Baffles are installed inside the housing to cover the bare metal can and give it a polished appearance.
- Types of Baffles:
- Simple Baffle: Most commonly used for recessed lighting.
- Reflective Baffle: Used to minimize light throw or provide directional coverage. It is effective for sloped ceilings or when you want to direct light to a specific area.
4. Lamp
Most recessed lighting fixtures use LED lamps, but there are other options available:
- A Lamp: The most common type of lamp used in various applications.
- R Lamp: Contains a reflector and provides excellent beam control for spot, flood, and display lighting.
- PAR Lamps: Excellent for task and general lighting, with wide beams.
- MR16: Ideal for accent lighting due to its excellent beam control.
Read more: Do LED Light Strips Ruin Walls?
Pros and Cons of Recessed Lighting
Recessed lighting offers several advantages for your home or office:
- It provides a hidden source of light.
- It is energy-efficient.
- It adds beauty and radiance to any room or space.
- It consumes less power compared to other lighting fixtures like chandeliers.
However, there are also some drawbacks to consider:
- Recessed lighting is a permanent installation.
- The installation process may require professional expertise and is not always DIY-friendly.
Tools for Installing Recessed Lighting
Before starting the installation process, make sure you have the following tools handy:
- Drywall saw
- Drill with hole-saw bit
- Pliers
- Screwdriver
- Linesman pliers
- Fish tape
- Voltage tester
How to Install Recessed Lighting
Before beginning the installation process, carefully read the manufacturer's instructions, as each fixture may have specific requirements. Follow these steps for a successful installation:
Turn off the Power: Locate the breaker panel and switch off the power to the room or circuit you'll be working on. Use a voltage tester to ensure the power is off.
Locate the Ceiling Joists: If it's a new installation, find the overhead ceiling joists to avoid drilling into them. Use a stud finder or go into the attic to identify the direction and spacing of the joists.
Take the Measurement: Most recessed lights come with a paper template to trace a circle on the ceiling. Mark the location for the light and ensure there are no nearby joists. If you're retrofitting an old light, measure the size of the existing hole.
Cut Out the Hole in the Ceiling: Drill the hole using a hole cutting drill bit as per the marked location. Then, use a drywall saw to cut out the circle for the light fixture. Take care not to overcut and damage the ceiling.
Remove Old Fixture and Junction Box: If retrofitting, remove the old light fixture and the junction box from the ceiling. Cut the junction box from the attached joist with a saw, being careful not to damage any wires.
Connect and Secure Wiring (Set Up the Junction Box): Open the attached junction box on the light fixture and clamp the wires protruding from the ceiling to the box. Connect the ground wire from the electrical source to the fixture's ground wire. Use wire nuts to pair the black and white wires together. Tuck the connected wires into the junction box and cover it.
Test Power: Temporarily turn the power back on and use a voltage tester to check if electricity reaches the bulb socket. Turn off the breaker again before proceeding.
Insert and Secure Housing: Insert the housing into the hole and use the attached clips to securely clamp it to the ceiling. Gently pull on the housing to ensure it is firm and push it up into the hole. Tap the clips with a hammer and screwdriver to lock them in place.
Attach Baffle and Trim: Attach the baffle and trim to the housing using the provided metal springs. Slide them upwards until the trim is level with the ceiling.
Select a Bulb: Choose a bulb with the appropriate base size, warmth, and wattage for your fixture. LED bulbs are a popular, modern, and energy-efficient choice for recessed lighting. Ensure the bulb is dimmable if using a dimmer switch.
Restore Power: Switch the power back on and inspect the installation. If you notice any issues like arcing, popping, or flickering lights, turn off the power and consult a licensed electrician.
Conclusion
Recessed lighting is an excellent choice for enhancing the ambiance and aesthetics of your home or office. It provides a hidden source of light that adds elegance and radiance to any space. However, it is important to consider the pros and cons before deciding on recessed lighting for your specific needs. By following the step-by-step installation guide provided above, you can successfully install recessed lighting and transform your space into a beautifully illuminated environment.