Scarab
There is a massive proportion of arrangements concerning different kinds of bugs. Regardless, when you look at a more unambiguous kind of bug, there are many shapes, sizes and appearances to see at this point. Concerning bugs, this is certainly self-evident! While they have some typical characteristics, different sorts are striking in their particular way.
Visit the Duck Coloring pages.
Sorting out some way to draw a scarab is a phenomenal strategy for parading this unfathomable and remarkable bug. That is what this educational activity is here to let you know the most effective way to do, so you'll have to see this one the entire way to the end!
With that, we should begin this little aid on the most capable technique to draw in a bug with just 6 straightforward undertakings!
Stage 1 - Scarab Drawing
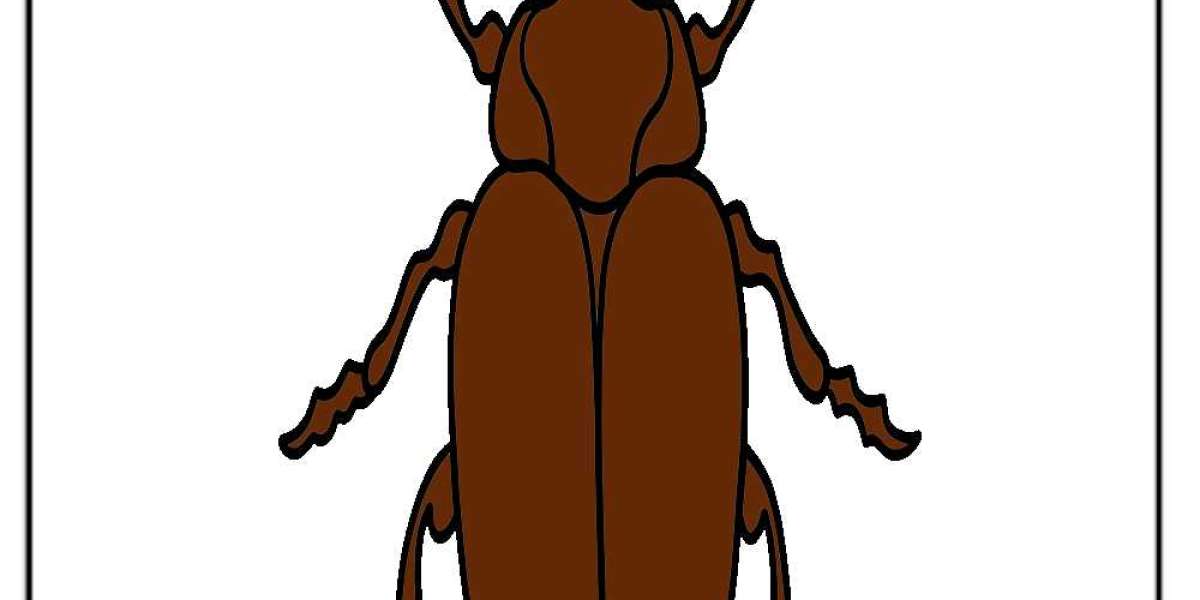
Scarabs regularly have a hard external on the most elevated mark of their short, squat bodies. That is certainly the circumstance with the model we will work on in this helper on the most capable technique to draw a bug. To start this cycle, we will begin with the highest point of the bug and the essential portion of the safeguarded back.
The highest point of this unpleasant little creature is tiny, diverged from an enormous part of the body, and it has a greater base that gets a piece slimmer as it goes. There are, like manner, a couple of short sensors on the sides of the head, and they each have a slim tail with thicker portions at the completions.
Finally, use a couple of changed lines to make the chief fragment of the built-up back that will interact directly with the head that you, as of late, drew. Then, you will be ready for stage 2 of the helper!
Stage 2 - As of now, draw the rest of the supported back
This second step of this scarab drawing will see you adding the rest of the supported back for this bug. We will add a huge, changed shape connecting with the essential back piece to do this. This part will cover the entire body, as the reference picture shows.
At the point when the outline is drawn, we will similarly add a couple of inward nuances. You can draw a little changed shape near the point of convergence of the back and, a short time later, widen a line from the tip of that shape to the tip of the back. This line will show where the built-up region separates when the scarab is flying. With these parts finished, the opportunity has arrived to progress toward stage 3 of the associate.
Stage 3: Draw the underlying two legs for the bug.
Unpleasant little creatures have six legs, and in this third step of our helper on the most capable strategy to draw a scarab, we will add the underlying two of these legs. These will go near the front of the bug, where the two regions of the safeguarded back meet.
The legs will be separated into two sections, the first being humble and smooth on one edge and bumpier on the other. The resulting fragment will be defined for specific unequivocally twisted boundaries for a sickle shape. We can then add a more prominent measure of these legs as we move further into the helper.
Stage 4 - Next, draw the extra legs
You completed the underlying two legs of this scarab drawing in the past step, and in this one, you will need to add the extra four. To the extent that plan, these legs will appear to be unclear from the underlying two, in that they will be contained two regions.
The major qualification will be that the middle legs are more restricted than others. Also, the legs at the back of the bug will be, by and large, longer. Make a genuine attempt to arrange these legs unequivocally as they appear in our reference picture for a more ordinary look! You'll then have the choice to add a couple of last nuances in the accompanying phase of the helper!
Stage 5 - Add the last nuances to your dreadful little creature drawing
It's almost time to finish with some concealing tomfoolery, yet first, there are two or three nuances to remember in this fifth step of our helper for the most capable technique to draw an unpleasant little creature. These nuances will generally fo on the essential portion of the intensely clad back. To clean them off, characterize a couple of straight limits coming to the length of the section.
When these nuances are drawn, you can add a couple of extra nuances of your own! Scarabs can be found in different circumstances, so if you expected to draw an establishment, you would have various options for the kind of establishment you add.
How should you complete this bug drawing before forging ahead toward the last step of the assistance?
Stage 6 - Finish your bug drawing with an assortment
This is the last step of this unpleasant little creature drawing, and in it, we will complete the image for specific tones. We used an essentially natural-hued assortment scheme for our model picture, yet we changed the shades of brown and added a spot of white to make the outside give off an impression of being shinier. Scarabs can arrive in many assortments, regardless, so you could merge various tones you love as well!